Table of Contents
Introduction to Homemade Italian Bread
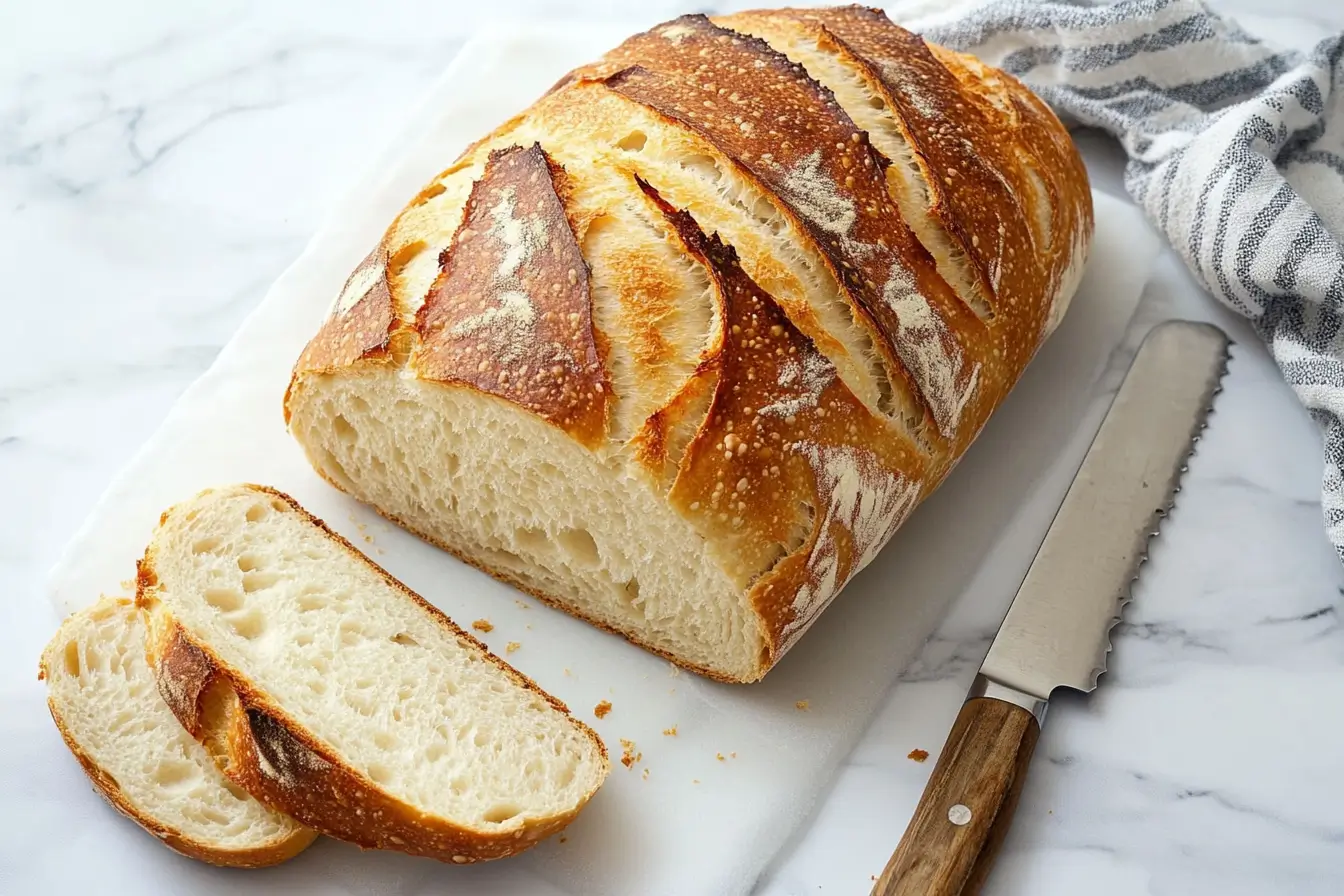
Few things in life compare to the warm, comforting aroma of homemade Italian bread fresh out of the oven. Whether you’re slicing into a golden-crusted ciabatta, dipping fluffy focaccia into olive oil, or tearing apart a rustic pane Toscano, baking your own bread is a deeply rewarding experience.
Italian bread isn’t just about food—it’s a tradition passed down through generations, rooted in simple ingredients and artisan techniques. While store-bought bread can be convenient, making it from scratch allows you to control the quality of ingredients, avoid unnecessary preservatives, and create a loaf that’s fresh, flavorful, and truly authentic.
In this guide, we’ll cover everything you need to know about baking perfect Italian bread at home. From choosing the right flour and mastering the kneading process to achieving that crispy crust, you’ll get expert insights, foolproof techniques, and even some delicious variations to try.
So, if you’ve ever wondered how to make light, airy, and irresistibly tasty Italian bread, you’re in the right place. Let’s get started!
Why You’ll Love This Recipe
There are plenty of reasons to fall in love with this homemade Italian bread recipe. Whether you’re a seasoned baker or just starting out, this recipe is designed to be simple, foolproof, and incredibly rewarding. Here’s why you’ll love it:
1. Authentic Italian Flavor
This recipe captures the traditional taste of Italian bread, with a crispy golden crust and a soft, airy interior. Every bite delivers that classic, bakery-style texture that pairs perfectly with your favorite meals.
2. Made with Simple, Wholesome Ingredients
You don’t need any fancy ingredients—just flour, water, yeast, salt, and olive oil. No preservatives, no additives—just pure, homemade goodness.
3. Easy to Follow, Even for Beginners
With step-by-step instructions, this recipe makes it easy to bake delicious Italian bread at home, even if you’ve never made bread before.
4. Versatile and Customizable
Want to add herbs, garlic, or cheese? This recipe is easy to customize, so you can create a variety of Italian bread styles, from focaccia to ciabatta and beyond.
5. Perfect for Any Meal
Whether you’re serving it with pasta, soups, sandwiches, or bruschetta, this bread complements any dish. It’s also great for dipping in olive oil or spreading with butter.
6. No Special Equipment Needed
You don’t need a bread machine or fancy tools—just an oven, mixing bowl, and baking sheet. A Dutch oven or pizza stone can enhance the crust, but they’re optional.
7. Better Than Store-Bought
Homemade Italian bread is fresher, healthier, and more flavorful than anything you’ll find at the store. Plus, it’s free of artificial ingredients and made with love!
If you’re ready to bake authentic Italian bread that’s soft, crusty, and absolutely delicious, this recipe is for you. Let’s get started!
Essential Ingredients for Homemade Italian Bread
To make authentic Italian bread, you’ll need just a few simple, high-quality ingredients. Each one plays a key role in achieving the perfect texture and flavor.
Basic Ingredients:
- Bread Flour (3 ½ cups) – Provides the best structure and chewiness. You can also use all-purpose flour, but bread flour gives a better rise.
- Warm Water (1 ¼ cups) – Activates the yeast and helps develop gluten for a soft interior.
- Active Dry Yeast (2 ¼ teaspoons or 1 packet) – Creates the airy texture by making the dough rise. Instant yeast can also be used.
- Salt (1 ½ teaspoons) – Enhances the bread’s flavor and strengthens the dough.
- Olive Oil (2 tablespoons) – Adds richness and a hint of Mediterranean flavor.
- Sugar or Honey (1 teaspoon, optional) – Helps activate the yeast and slightly enhances the taste.
Optional Additions for Extra Flavor:
- Herbs (Rosemary, Thyme, Oregano, or Basil) – Infuses the bread with aromatic Italian flavors.
- Garlic Powder (½ teaspoon) – Adds a subtle, savory depth.
- Parmesan Cheese (¼ cup, grated) – For a cheesy, golden crust.
- Sesame or Poppy Seeds (for topping) – Adds crunch and visual appeal.
Using these essential ingredients, you’ll be able to make a classic Italian bread that’s crispy on the outside, soft on the inside, and full of flavor.
Step-by-Step Guide to Making Homemade Italian Bread
Step 1: Activate the Yeast
- In a small bowl, mix 1 ¼ cups warm water (about 110°F/45°C) with 2 ¼ teaspoons active dry yeast and 1 teaspoon sugar or honey (optional).
- Stir gently and let sit for 5–10 minutes until it becomes foamy. This confirms the yeast is active.

Step 2: Mix the Dough
- In a large mixing bowl, combine 3 ½ cups bread flour and 1 ½ teaspoons salt.
- Create a well in the center and add the activated yeast mixture along with 2 tablespoons olive oil.
- Stir with a wooden spoon or use a stand mixer with a dough hook until the mixture forms a shaggy dough.
Step 3: Knead the Dough
- Transfer the dough to a lightly floured surface and knead for 8–10 minutes until it becomes smooth and elastic.
- If using a stand mixer, knead on medium speed for 5–7 minutes.
- If the dough is too sticky, add 1 tablespoon of flour at a time. If too dry, add 1 teaspoon of water.

Step 4: First Rise (Proofing)
- Place the dough in a greased bowl, cover with a damp towel, and let it rise in a warm place for 1–2 hours, or until it doubles in size.
- Ideal proofing temperature is 75–85°F (24–29°C).
Step 5: Shape the Dough
- Gently punch down the dough to release air bubbles.
- Shape it into a round (boule) or oval (batard) loaf. You can also form baguette-style loaves.
- Place on a parchment-lined baking sheet or a floured proofing basket (banneton).

Step 6: Second Rise
- Cover the shaped dough with a kitchen towel and let it rise again for 30–45 minutes.
- Meanwhile, preheat your oven to 425°F (220°C).
Step 7: Score the Dough
- Use a sharp knife or bread lame to cut shallow slashes on top. This allows steam to escape and creates a beautiful crust.
Step 8: Bake the Bread
- Place the bread in the preheated oven. For a crispier crust, place a shallow pan of hot water on the bottom rack.
- Bake for 25–30 minutes until golden brown. The bread should sound hollow when tapped on the bottom.
Step 9: Cool and Enjoy
- Let the bread cool on a wire rack for at least 20 minutes before slicing. This helps set the texture.
- Serve warm with olive oil, butter, or alongside your favorite Italian dishes.
Now you have a perfect homemade Italian bread—crispy on the outside, soft and airy inside!
Expert Tips for Perfect Homemade Italian Bread
Want to take your homemade Italian bread to the next level? These expert tips will help you achieve a crispy crust, soft interior, and rich flavor—just like traditional Italian bakers do!
1. Use High-Quality Flour
- Bread flour is best for a chewy texture, but all-purpose flour can also work.
- For a more rustic loaf, try mixing in whole wheat flour or semolina flour.
2. Measure Ingredients Accurately
- Use a kitchen scale to weigh flour instead of using measuring cups for precision.
- Too much flour can make the bread dense, while too little can make it too sticky.
3. Get the Right Dough Consistency
- The dough should be slightly sticky but easy to handle.
- If it’s too dry, add a teaspoon of water at a time. If it’s too wet, add a little more flour.
4. Let the Dough Rise Properly
- Always let the dough double in size during the first rise for better flavor and texture.
- If your kitchen is cold, place the dough in a warm oven (turned off) with a bowl of hot water for better rising.
5. Don’t Skip the Second Rise
- A second rise improves the bread’s structure and creates air pockets for a lighter texture.
- Let it rest for at least 30–45 minutes before baking.
6. Score the Dough for a Professional Look
- Use a sharp knife or bread lame to make slashes on the top before baking.
- This helps the bread expand evenly and gives it a beautiful artisan appearance.
7. Create Steam for a Crispy Crust
- Place a shallow pan of hot water in the oven while baking to create steam.
- You can also spray the oven walls with water right after putting the bread in.
8. Bake at the Right Temperature
- Preheat your oven to 425°F (220°C) for the best crust.
- For extra crispiness, bake directly on a pizza stone or cast-iron pan.
9. Let the Bread Cool Before Slicing
- It’s tempting to slice the bread immediately, but let it cool for at least 20 minutes.
- Cutting too early releases steam too fast, making the bread gummy inside.
Reheating and Storing Homemade Italian Bread
To keep your homemade Italian bread fresh and delicious, proper storage and reheating methods are essential. Here’s how to preserve its flavor and texture for days.
How to Store Italian Bread
✔ At Room Temperature (Best for Short-Term Storage)
- Wrap the bread in a clean kitchen towel or store it in a paper bag.
- Keep it in a cool, dry place, away from direct sunlight.
- Avoid storing in a plastic bag, as it traps moisture and softens the crust.
- Stays fresh for two to three days.
✔ In the Freezer (Best for Long-Term Storage)
- Slice the bread before freezing for easy reheating.
- Wrap tightly in plastic wrap or foil, then place in a ziplock bag.
- Store for up to three months.
- To thaw, leave at room temperature for 30 to 60 minutes or heat directly from frozen.
How to Reheat Italian Bread
✔ In the Oven (Best for Restoring Crispiness)
- Preheat oven to 350°F (175°C).
- Wrap bread in foil for a softer texture or leave uncovered for a crispier crust.
- Bake for 10 to 15 minutes, or 20 minutes if frozen.
✔ On the Stovetop
- Heat a dry skillet over medium heat.
- Place slices on the pan for one to two minutes per side until warm and slightly crispy.
✔ In the Microwave (Quickest Method – But Not Recommended for Crusty Bread)
- Wrap bread in a damp paper towel to prevent drying out.
- Microwave for 10 to 15 seconds per slice.
- Best for softening but will not restore the crispy crust.
✔ Reviving Stale Bread
- Lightly sprinkle water on the crust and bake at 375°F (190°C) for five to ten minutes.
- This refreshes the texture and brings it back to life.
By following these storage and reheating tips, you can enjoy fresh-tasting Italian bread for days without losing its authentic texture and flavor.
Common Mistakes When Making Homemade Italian Bread
Even experienced bakers can run into problems when making homemade Italian bread. Here are the most common mistakes and how to fix them for a perfect loaf every time.
1. Using the Wrong Flour
- Mistake: Using low-protein flour, like cake or pastry flour, which results in a weak dough.
- Fix: Use bread flour for better gluten development and a chewy texture. All-purpose flour can work, but it may not give the same structure.
2. Not Measuring Ingredients Properly
- Mistake: Scooping flour directly from the bag, which can lead to too much flour and a dense loaf.
- Fix: Use a kitchen scale for accuracy. If using cups, spoon the flour into the cup and level it off instead of packing it down.
3. Water Temperature is Too Hot or Too Cold
- Mistake: Using water that is too hot can kill the yeast, while cold water slows fermentation.
- Fix: The ideal water temperature is 105–110°F (40–43°C) for active dry yeast. If you do not have a thermometer, the water should feel warm but not hot.
4. Not Kneading the Dough Enough
- Mistake: Under-kneading leads to weak gluten development, making the bread dense and crumbly.
- Fix: Knead the dough for 8–10 minutes by hand or 5–7 minutes in a stand mixer until smooth and elastic. The dough should pass the “windowpane test”—stretch a small piece, and if it forms a thin, see-through layer without tearing, it is ready.
5. Over-Kneading the Dough
- Mistake: Kneading too much can result in a tough, overly tight crumb.
- Fix: Stop kneading once the dough is smooth and slightly tacky but elastic. If using a stand mixer, avoid running it for more than 7 minutes at medium speed.
6. Not Allowing the Dough to Rise Properly
- Mistake: Cutting the rising time short results in a dense and underdeveloped loaf.
- Fix: Let the dough rise until it doubles in size. This usually takes 1 to 2 hours, depending on room temperature. A warm environment (75–85°F) helps.
7. Overproofing the Dough
- Mistake: Leaving the dough to rise too long can cause it to collapse when baked.
- Fix: Press a fingertip gently into the dough. If the indentation springs back slowly, it is ready. If it deflates completely, it has overproofed.
8. Skipping the Second Rise
- Mistake: Not letting the shaped dough rise before baking can result in a dense loaf.
- Fix: Allow the dough to rise again for 30–45 minutes after shaping to develop the right texture.
9. Not Scoring the Dough Before Baking
- Mistake: Skipping this step can cause uneven expansion or cracks.
- Fix: Use a sharp knife or bread lame to make shallow slashes on top. This directs the bread’s expansion while baking.
10. Baking at the Wrong Temperature
- Mistake: An oven that is too hot can burn the crust while leaving the inside undercooked. Too low, and the bread will be pale and dry.
- Fix: Bake at 425°F (220°C) for the best balance of crust and crumb. Use an oven thermometer to check accuracy.
Frequently Asked Questions About Homemade Italian Bread
What Makes Italian Bread Different?
Italian bread stands out for its rustic texture, crispy crust, and airy interior. Unlike French bread, which often contains butter or sugar, traditional Italian bread relies on olive oil and simple ingredients. Many Italian breads, like pane Toscano, are made without salt, giving them a unique taste that pairs well with savory dishes.
What Is the Best Flour to Use for Italian Bread?
The best flour for Italian bread is bread flour, as it has a higher protein content, which helps develop gluten for a chewy texture. However, some recipes also use 00 flour, a finely milled Italian flour that creates a softer crumb, especially in ciabatta and focaccia. Whole wheat or semolina flour can also be added for extra flavor and texture.
What Gives Italian Bread Its Unique Flavor?
Italian bread gets its distinct flavor from slow fermentation, high-quality olive oil, and minimal ingredients. The long fermentation process enhances the depth of flavor by allowing natural sugars to develop. Some variations include herbs, garlic, or even wine, giving each region in Italy its own signature taste.
Why Is My Homemade Italian Bread So Dense?
A dense loaf is usually caused by under-kneading, not enough rising time, or using too much flour. To achieve a light, airy bread:
✔ Knead the dough until it passes the windowpane test (stretching without tearing).
✔ Allow the dough to rise fully until it doubles in size.
✔ Use precise measurements, as too much flour can make the dough stiff.
✔ Ensure your yeast is fresh and properly activated before mixing.
Why Does Italian Bread Taste Better?
Homemade Italian bread tastes better because of its natural ingredients, long fermentation, and traditional baking techniques. Unlike mass-produced bread, which often contains preservatives and artificial flavors, Italian bread is made with flour, water, yeast, salt, and olive oil, allowing the authentic flavors to shine. The crusty exterior and soft interior also create a perfect balance of texture and taste.
Conclusion
Making homemade Italian bread is simple, rewarding, and brings authentic flavor to your kitchen. With the right ingredients, proper kneading, and patience during rising, you can achieve the perfect crispy crust and airy interior. Avoid common mistakes, store it properly, and enjoy it with your favorite meals. Now, it’s time to bake and savor the taste of fresh, homemade Italian bread!
Explore more tasty recipes
How to Make Beef Breakfast Sausage from Scratch?
How to Make Perfect Sweet Potato Biscuits at Home?
How to Bake Moist Banana Bread: 5 Expert Hacks?
Homemade Italian Bread
Ingredients
Method
- 1. In a small bowl, combine warm water, yeast, and sugar/honey.2. Stir and let sit for 5–10 minutes, until foamy.
- 3. In a large bowl, mix flour and salt.4. Add the yeast mixture and olive oil. Stir until combined.
- 5. Transfer to a floured surface and knead for 8–10 minutes until smooth and elastic.
- 6. Place the dough in a greased bowl, cover, and let rise in a warm place for 1–2 hours, or until doubled in size.
- 7. Punch down the dough, shape it into a round or oval loaf, and place on a parchment-lined baking sheet.
- 8. Cover with a towel and let it rise for another 30–45 minutes.9. Preheat the oven to 425°F (220°C).
- 10. Use a sharp knife to score the top.11. Bake for 25–30 minutes, until golden brown.
- 12. Let the bread cool for 20 minutes before slicing. Enjoy!
Nutrition
Notes
- For a crispier crust, place a pan of hot water in the oven while baking.
- To check if the bread is done, tap the bottom—it should sound hollow.
- Store at room temperature for 2–3 days or freeze for up to 3 months.